mei is a mermaid character i rigged and textured for my semester-long capstone project. i wanted to improve in applying realistic references to a stylized character.
professor: barbara klein
mentor: keith lango
model: ellie lenz
special thanks: mason smith, ben moder, gus mcclain, krystal gonzalez
design
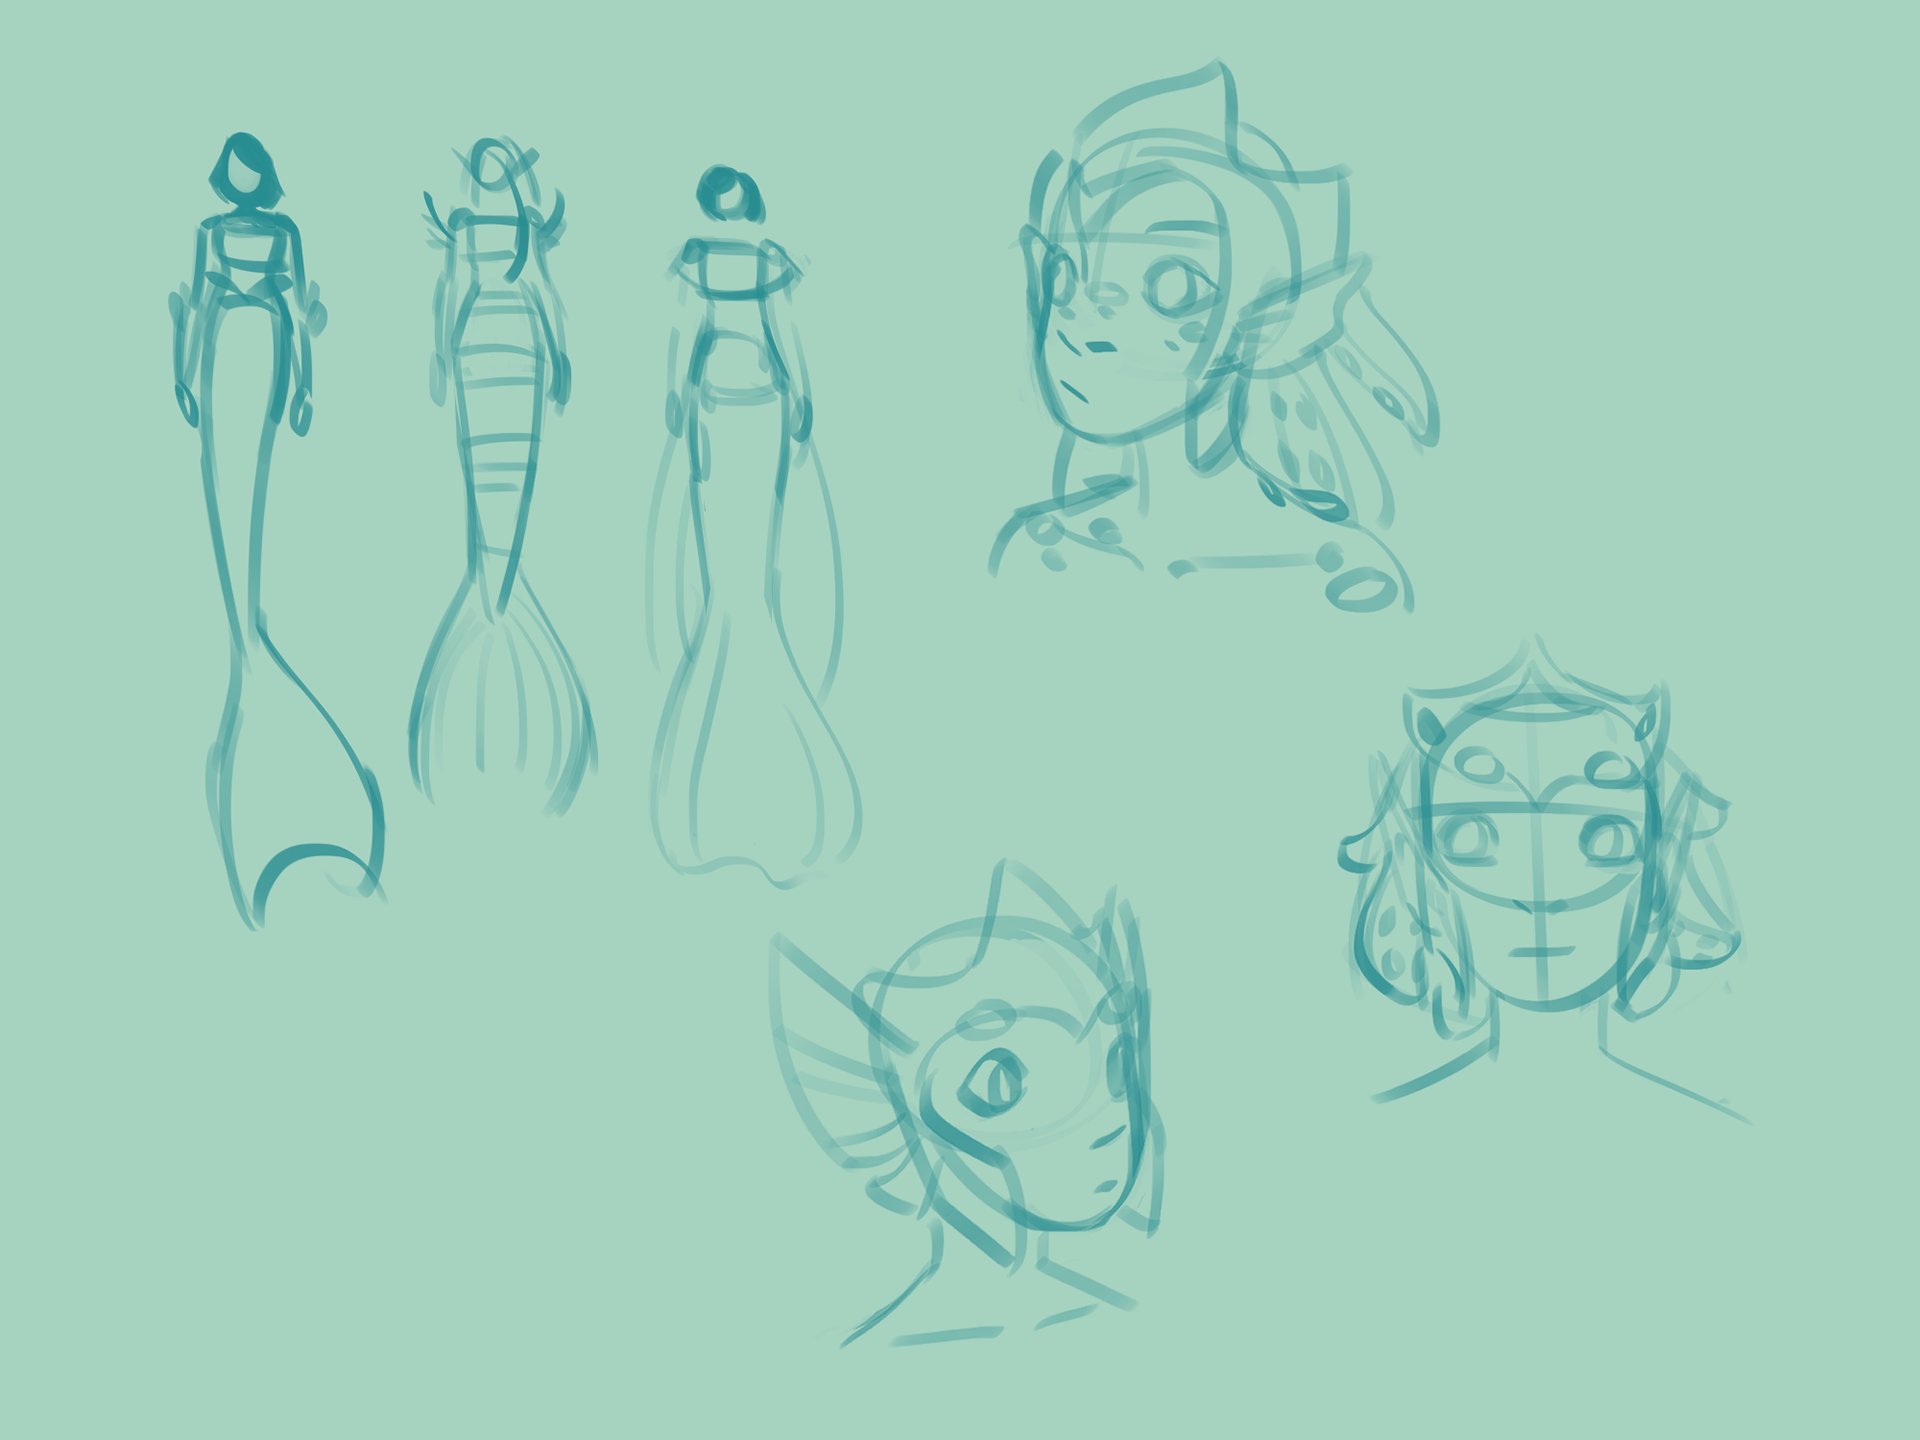
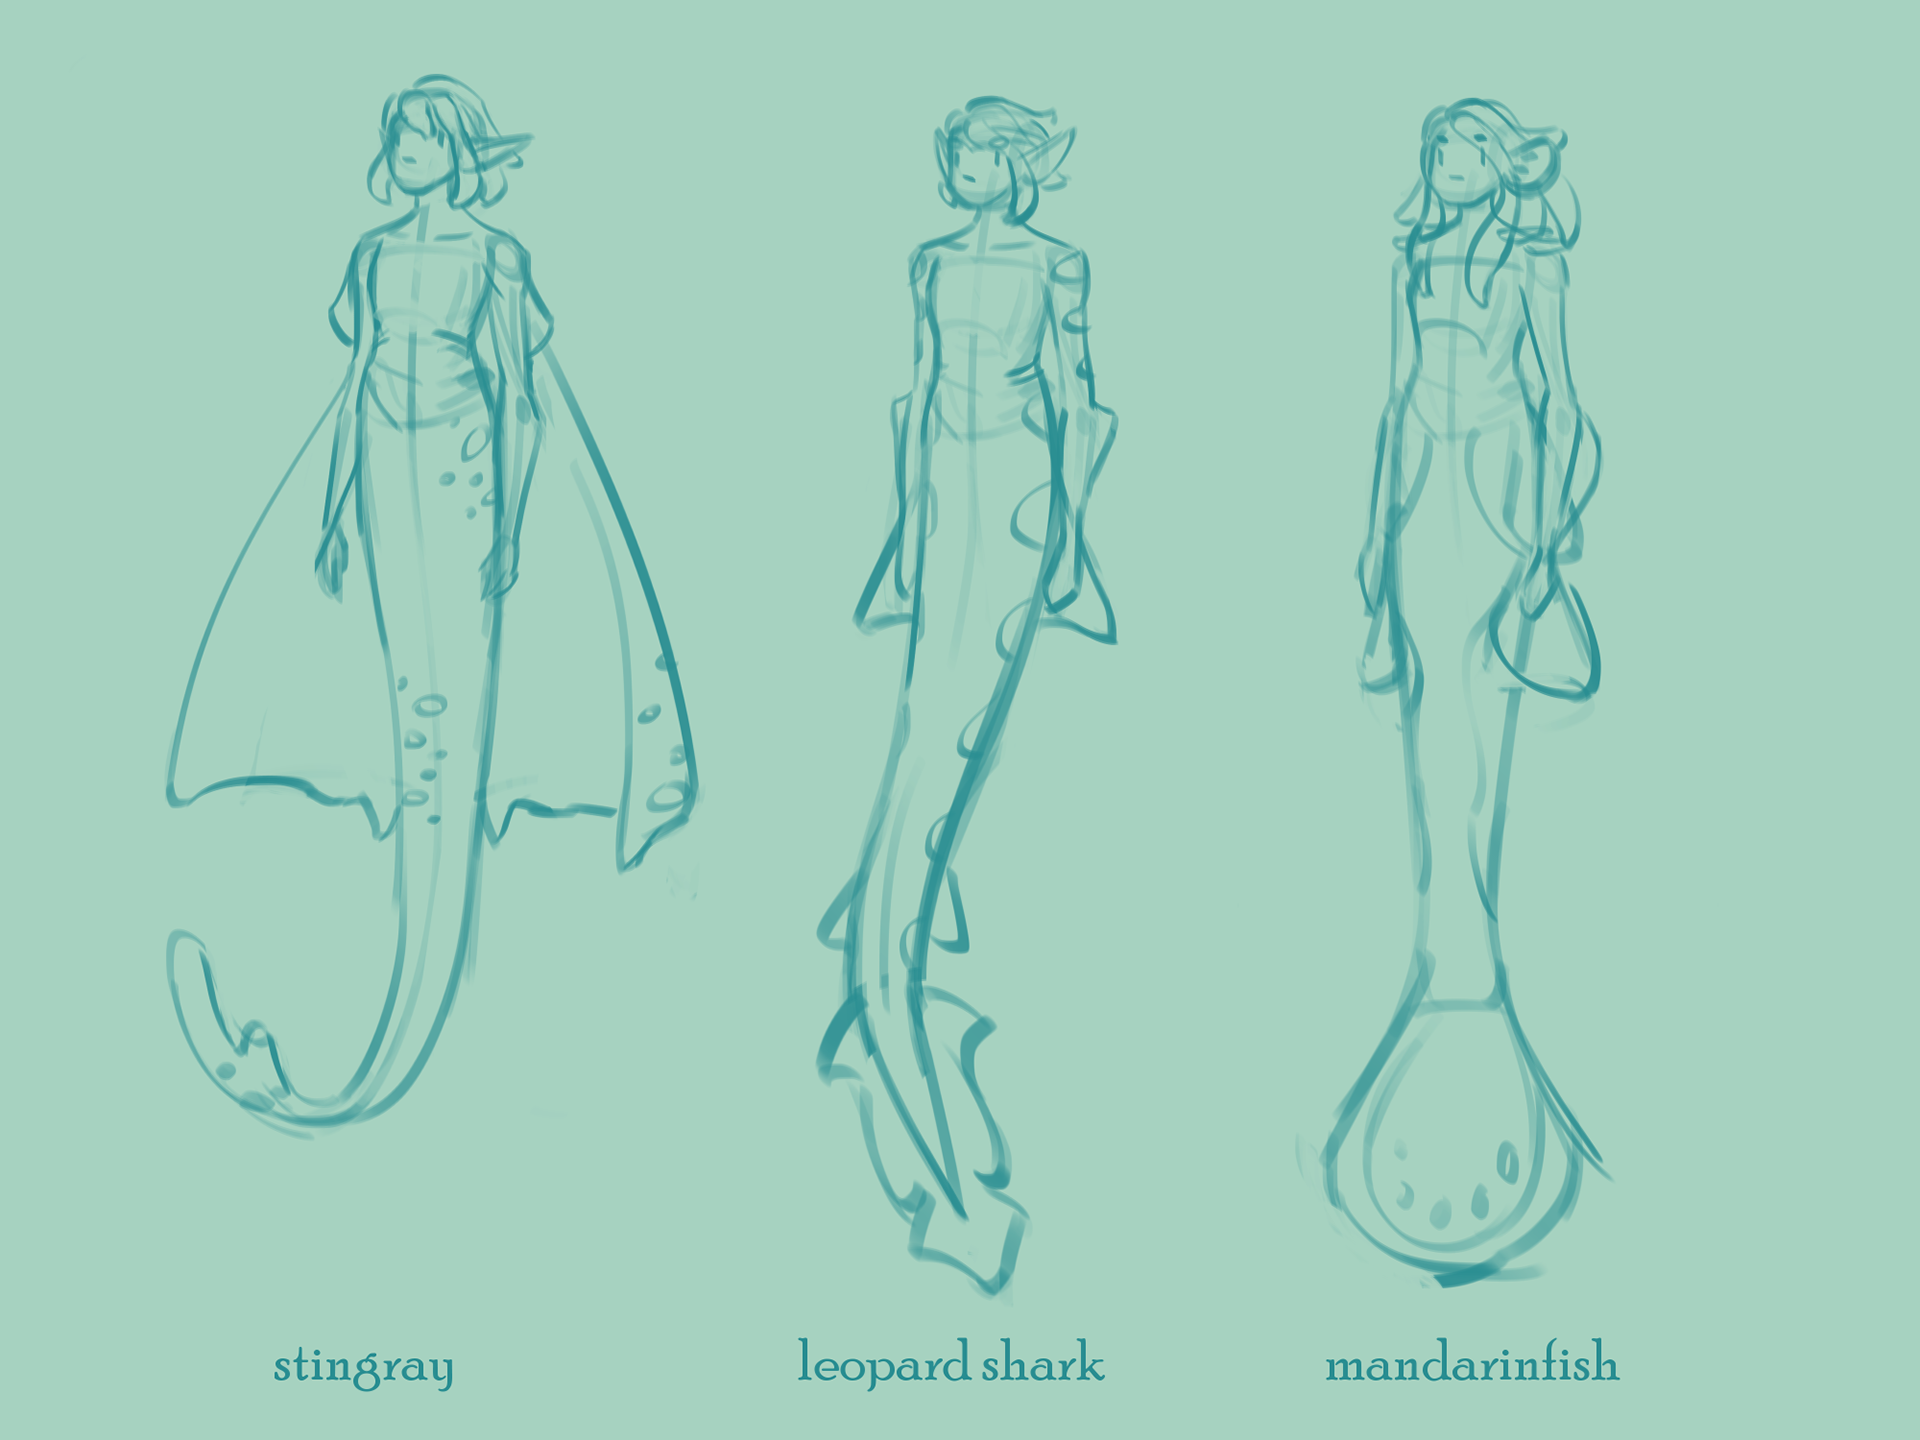
initial sketches
design iterations
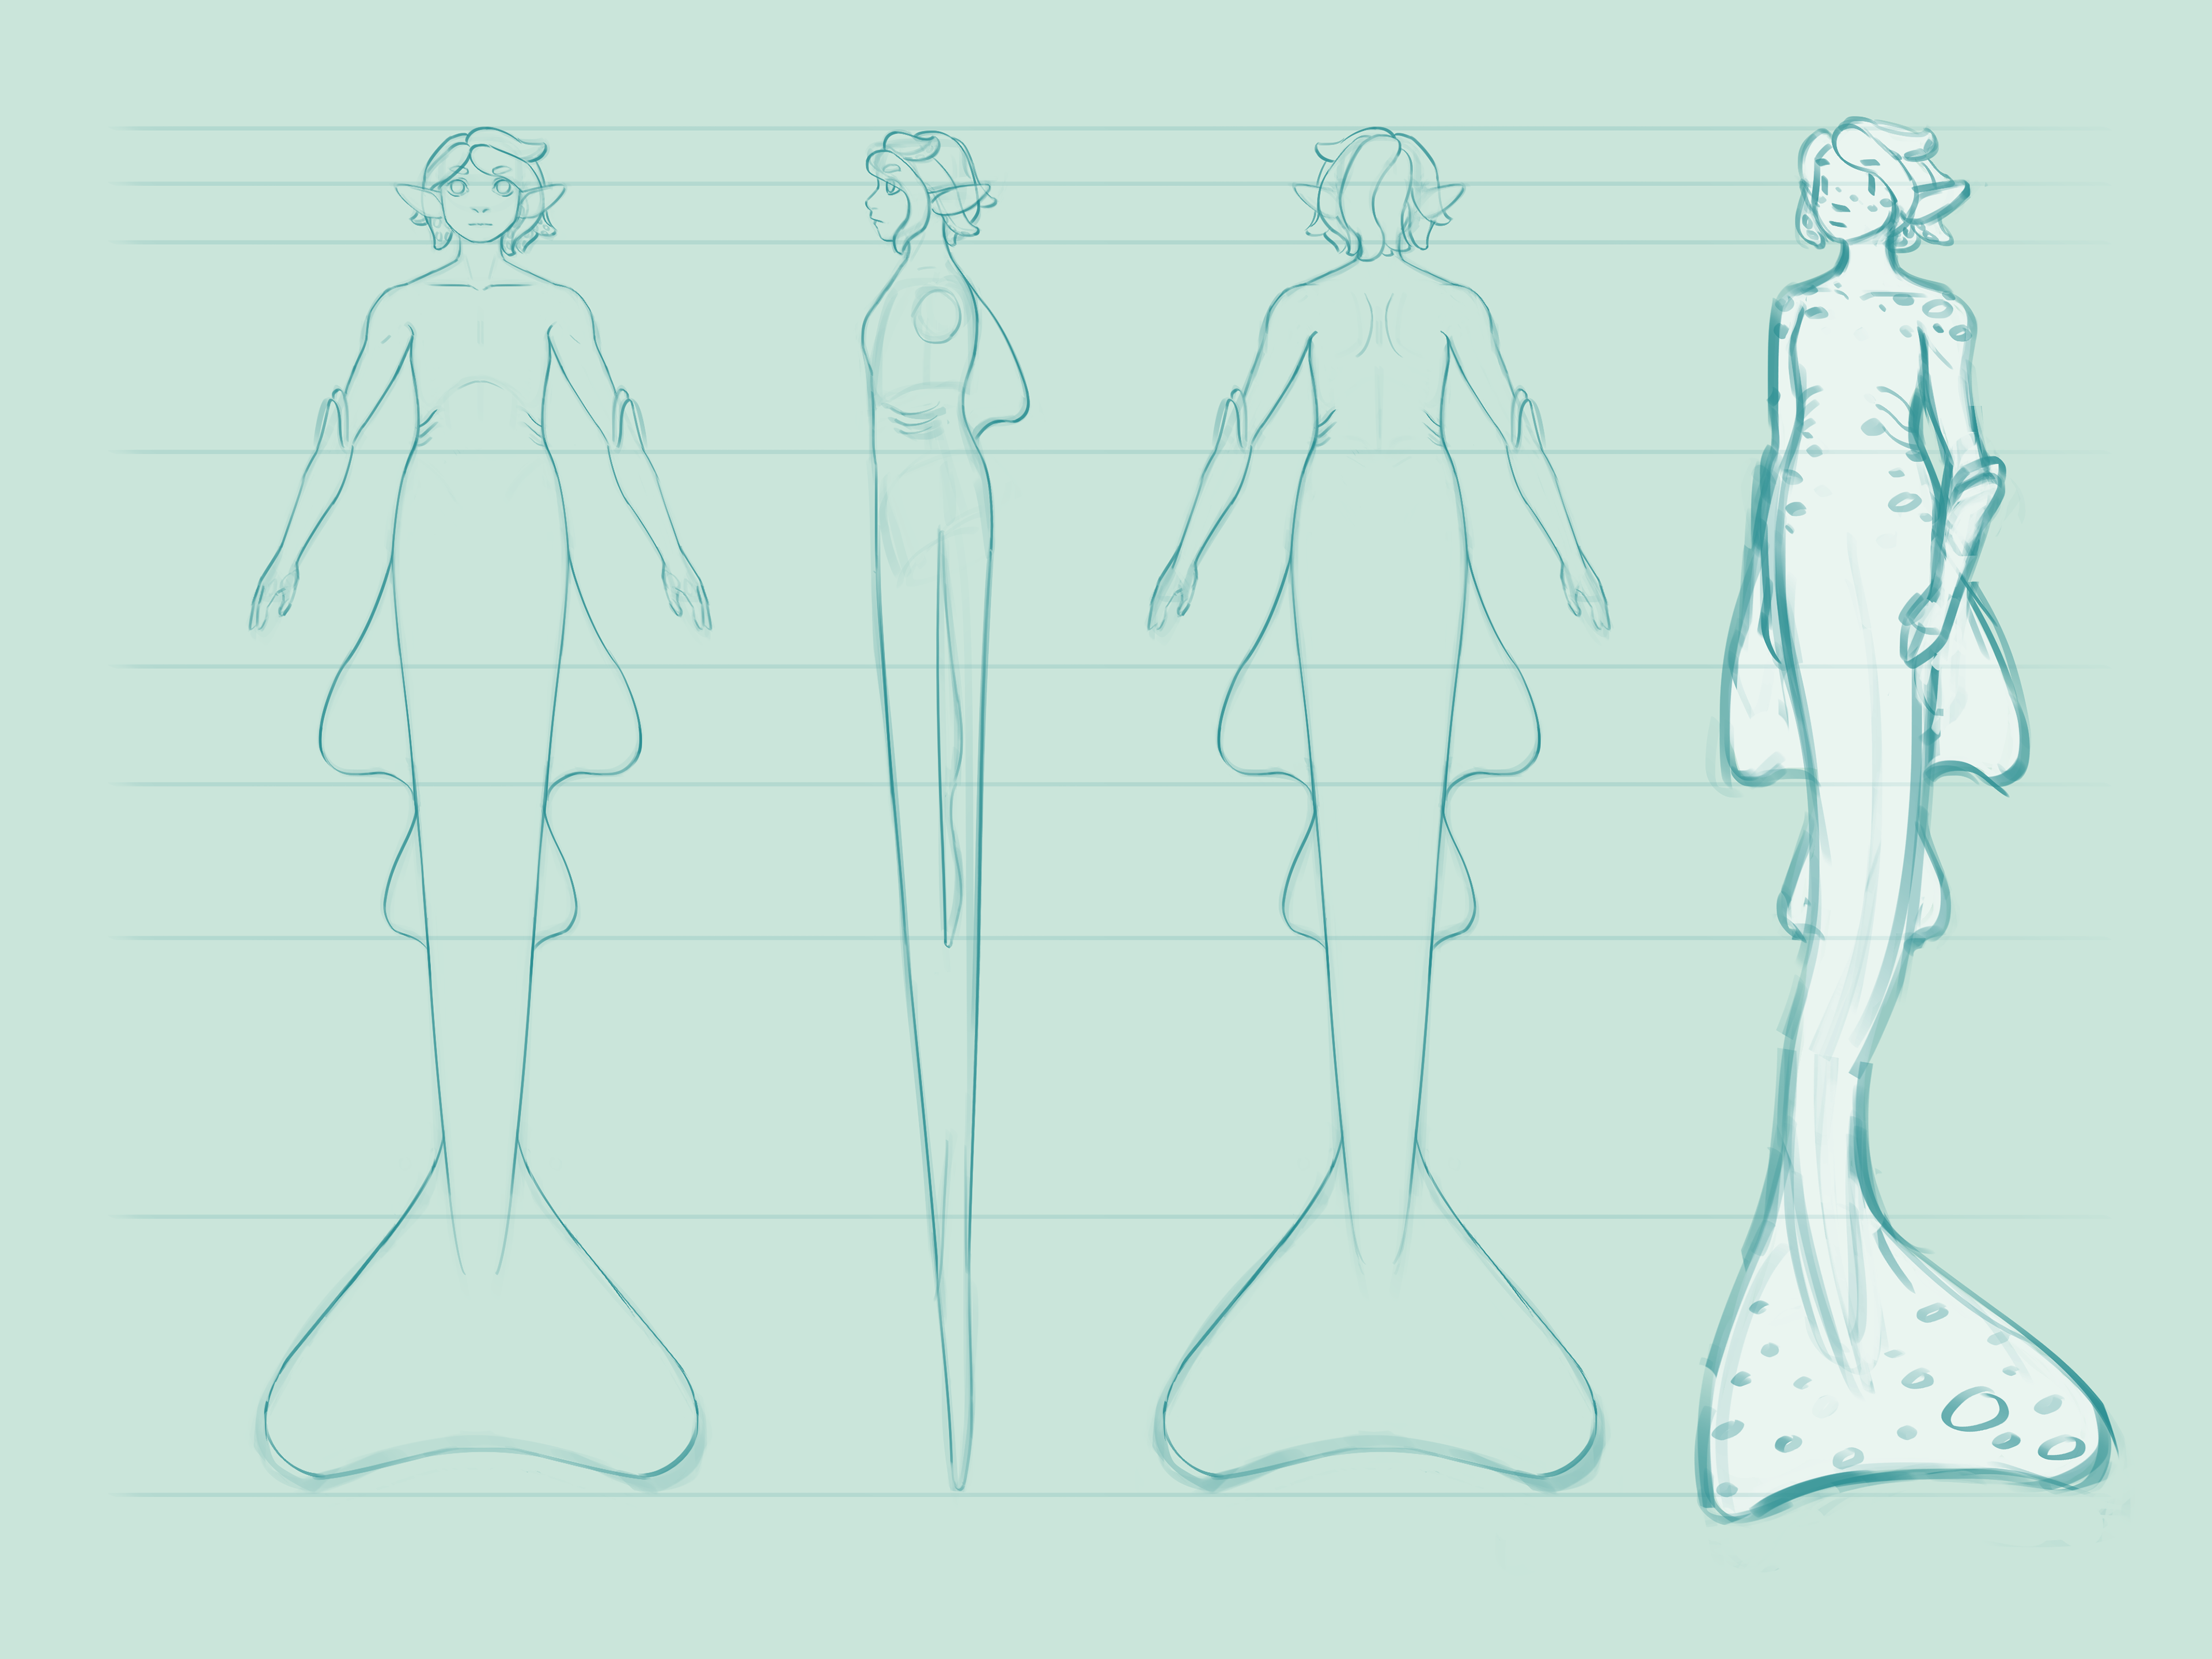
final orthographics

reference for modeler
mei's design was not part of my capstone, but i wanted to briefly touch on my thought process while creating her and how it relates to her texture, rig, and animations.
i knew i wanted to create a mermaid, which turned into wanting to create a shark mermaid. however, sharks swim in a horizontal motion, while i believed it would be more efficient for a creature with a humanoid upper body to swim in a vertical motion. this would mean that if she were shark-like, the fluke (tail fin) would be oriented parallel to her shoulders, and fins that would be placed above the spine would instead be on her sides. this would be applied not only to her outward design, but to her muscular system and movement.
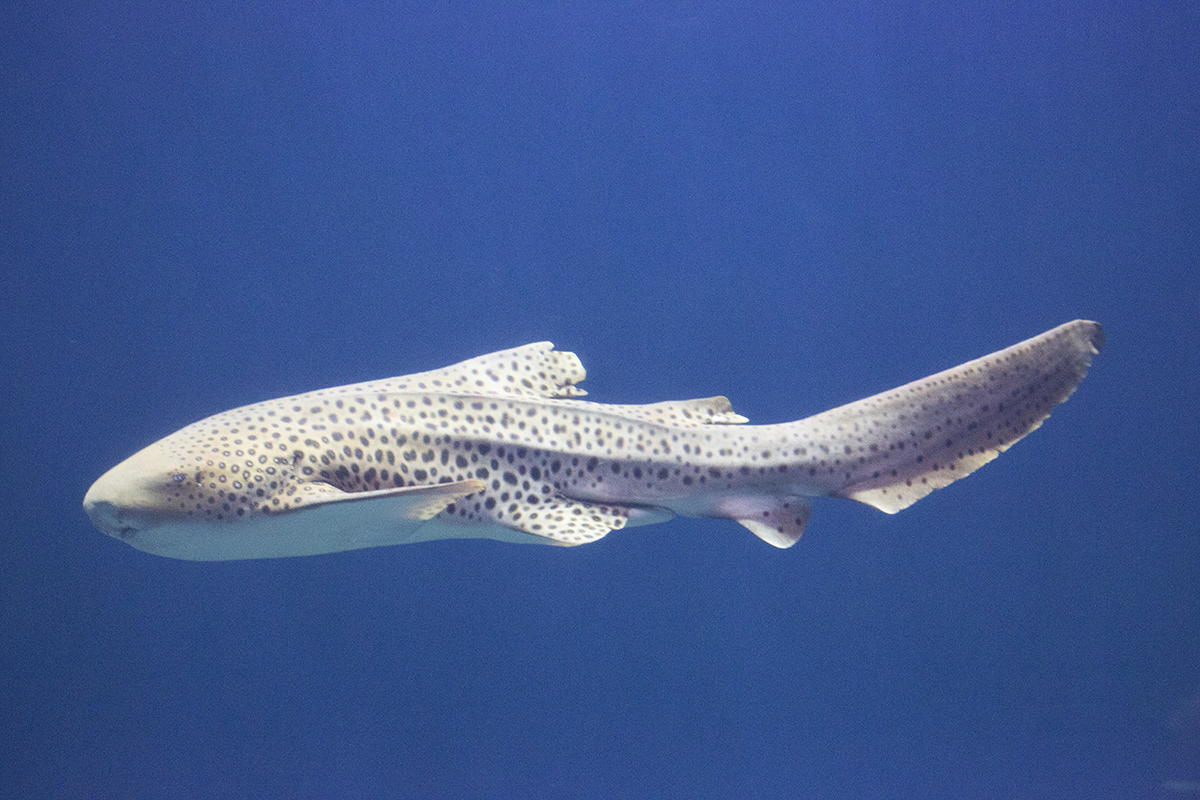
zebra sharks were the inspiration for the final design. the tail musculature and fluke resembles that of cetaceans such as dolphins and whales, as they swim with a vertical motion. the hair resembles octopus tentacles.
texture
style inspiration
arcane (2021), spider-man: into the spider-verse (2018) and bastion (2011) are three of many works of stylized computer-generated animation that have inspired me. i have also been texture painting for shining isle productions on the wingfeather saga animated series. the blend between cg and hand-drawn art has always intrigued me. i love seeing rough brush strokes in painting and wanted to apply this to a cg character.
i wanted to create an independent texture map that would include specularity, ambient shadows, and the like in one. lighting would then be applied to the character using a special shader. arcane and the wingfeather saga were my biggest inspirations for the final look.
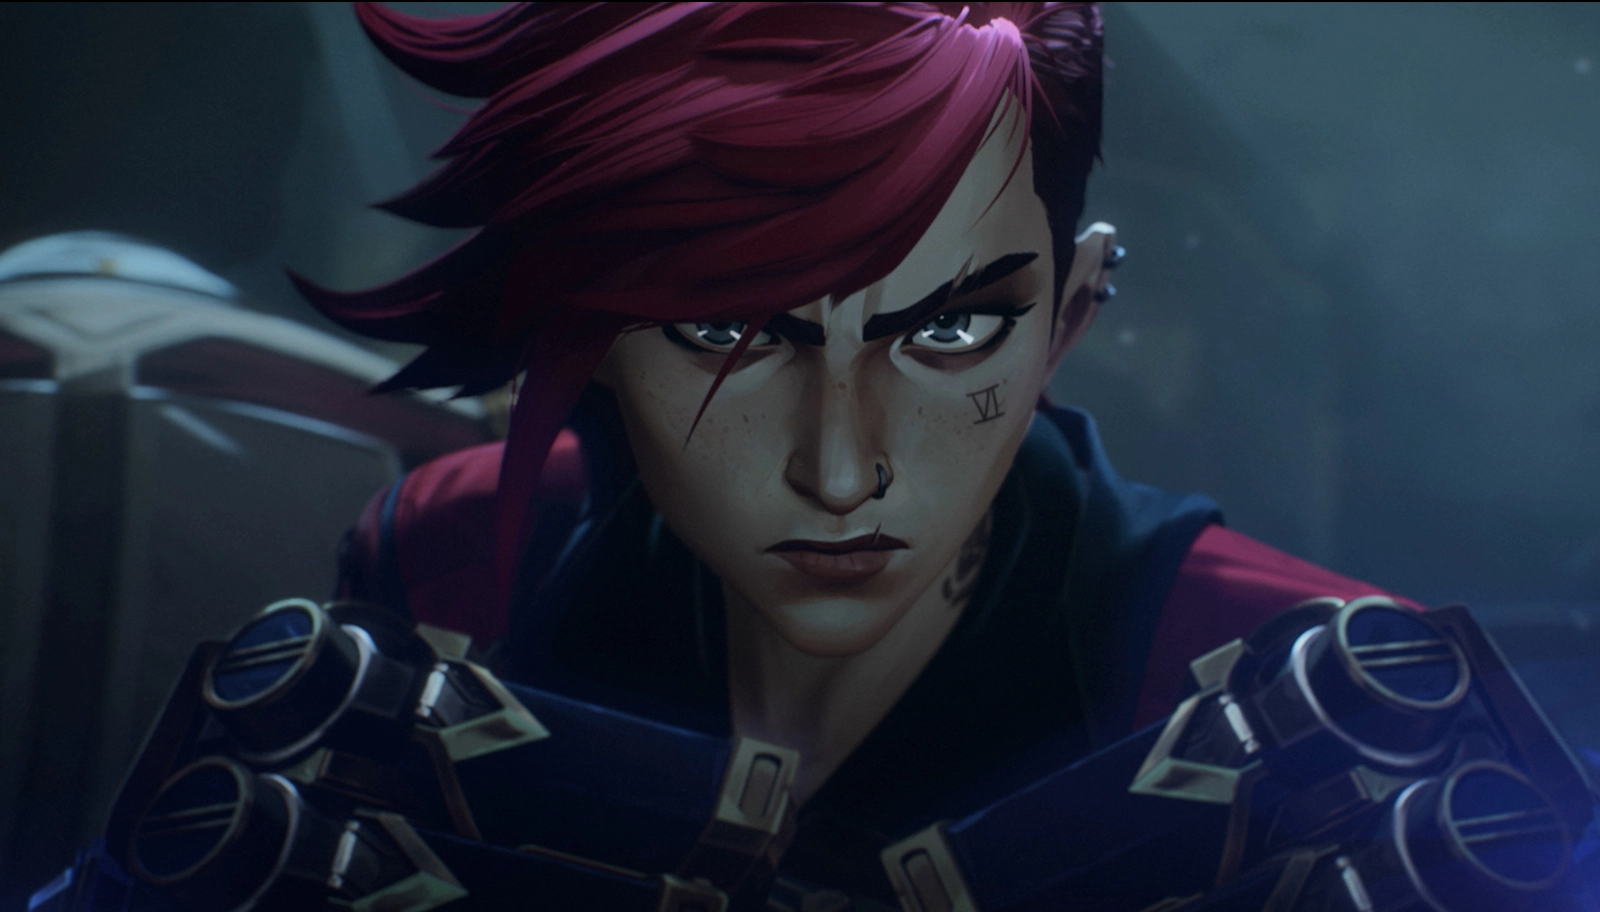
arcane
into the spider-verse
bastion
the wingfeather saga - janner and tink

the wingfeather saga - nia
loish - scarf

loish - mermaid
realistic inspiration
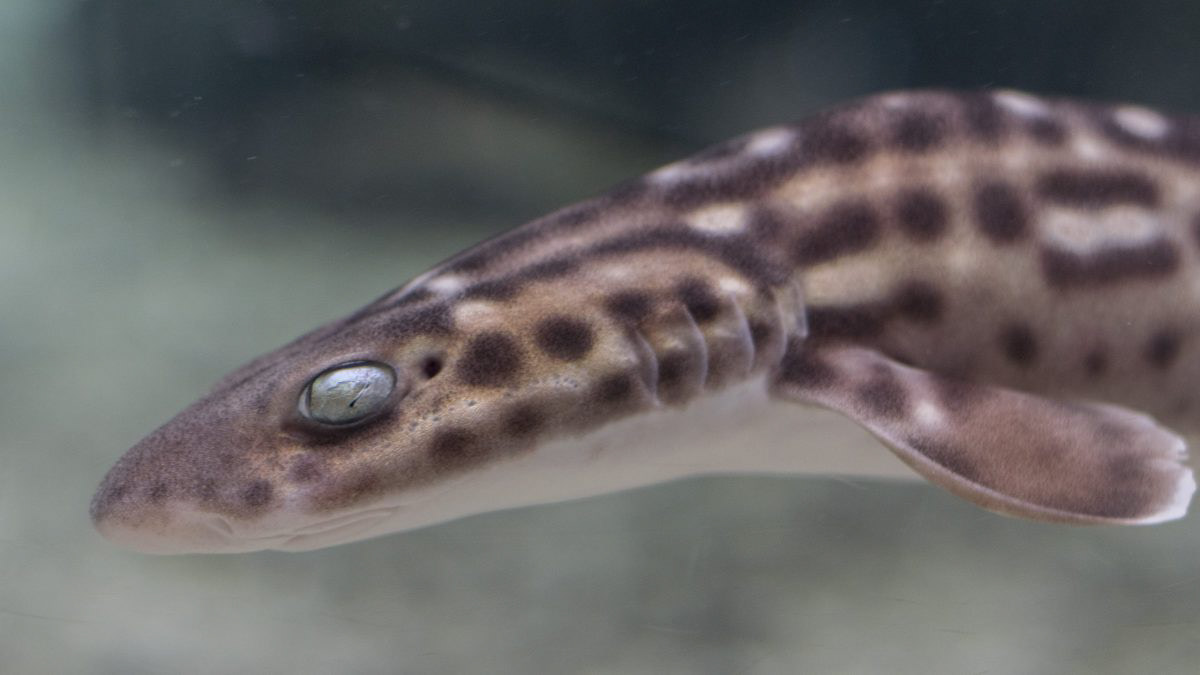
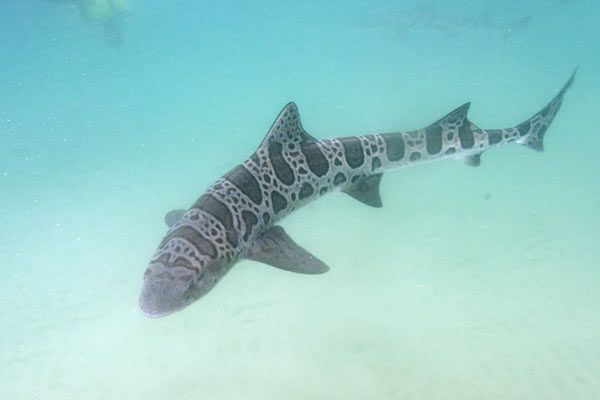
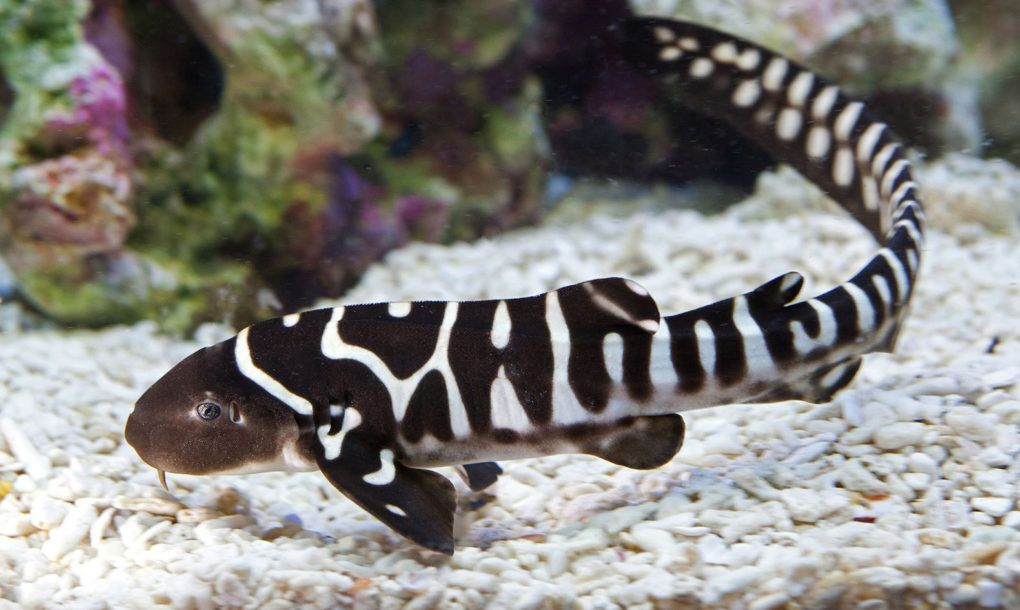
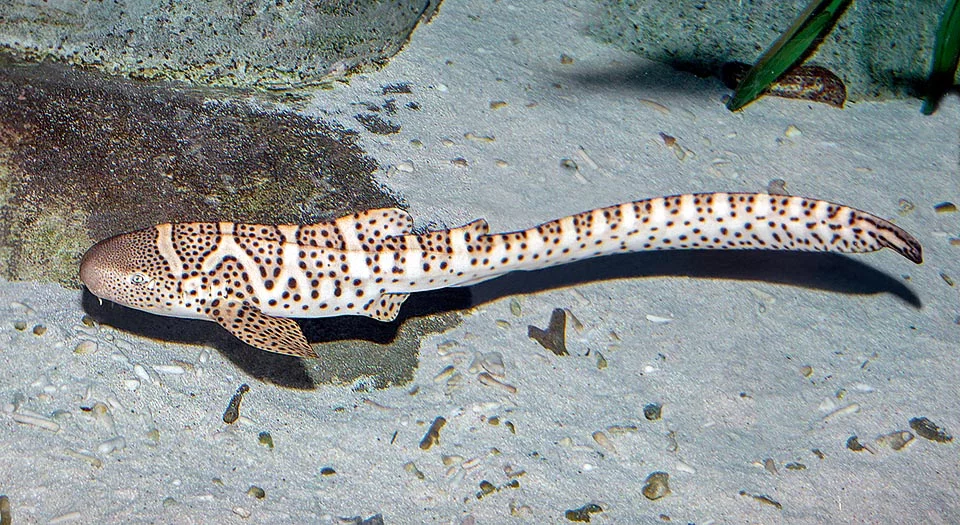
i knew i wanted to create a mermaid inspired by sharks. as i researched, i found a love for the bold and unique texturing patterns on smaller sharks such as catsharks, leopard sharks, and zebra sharks.
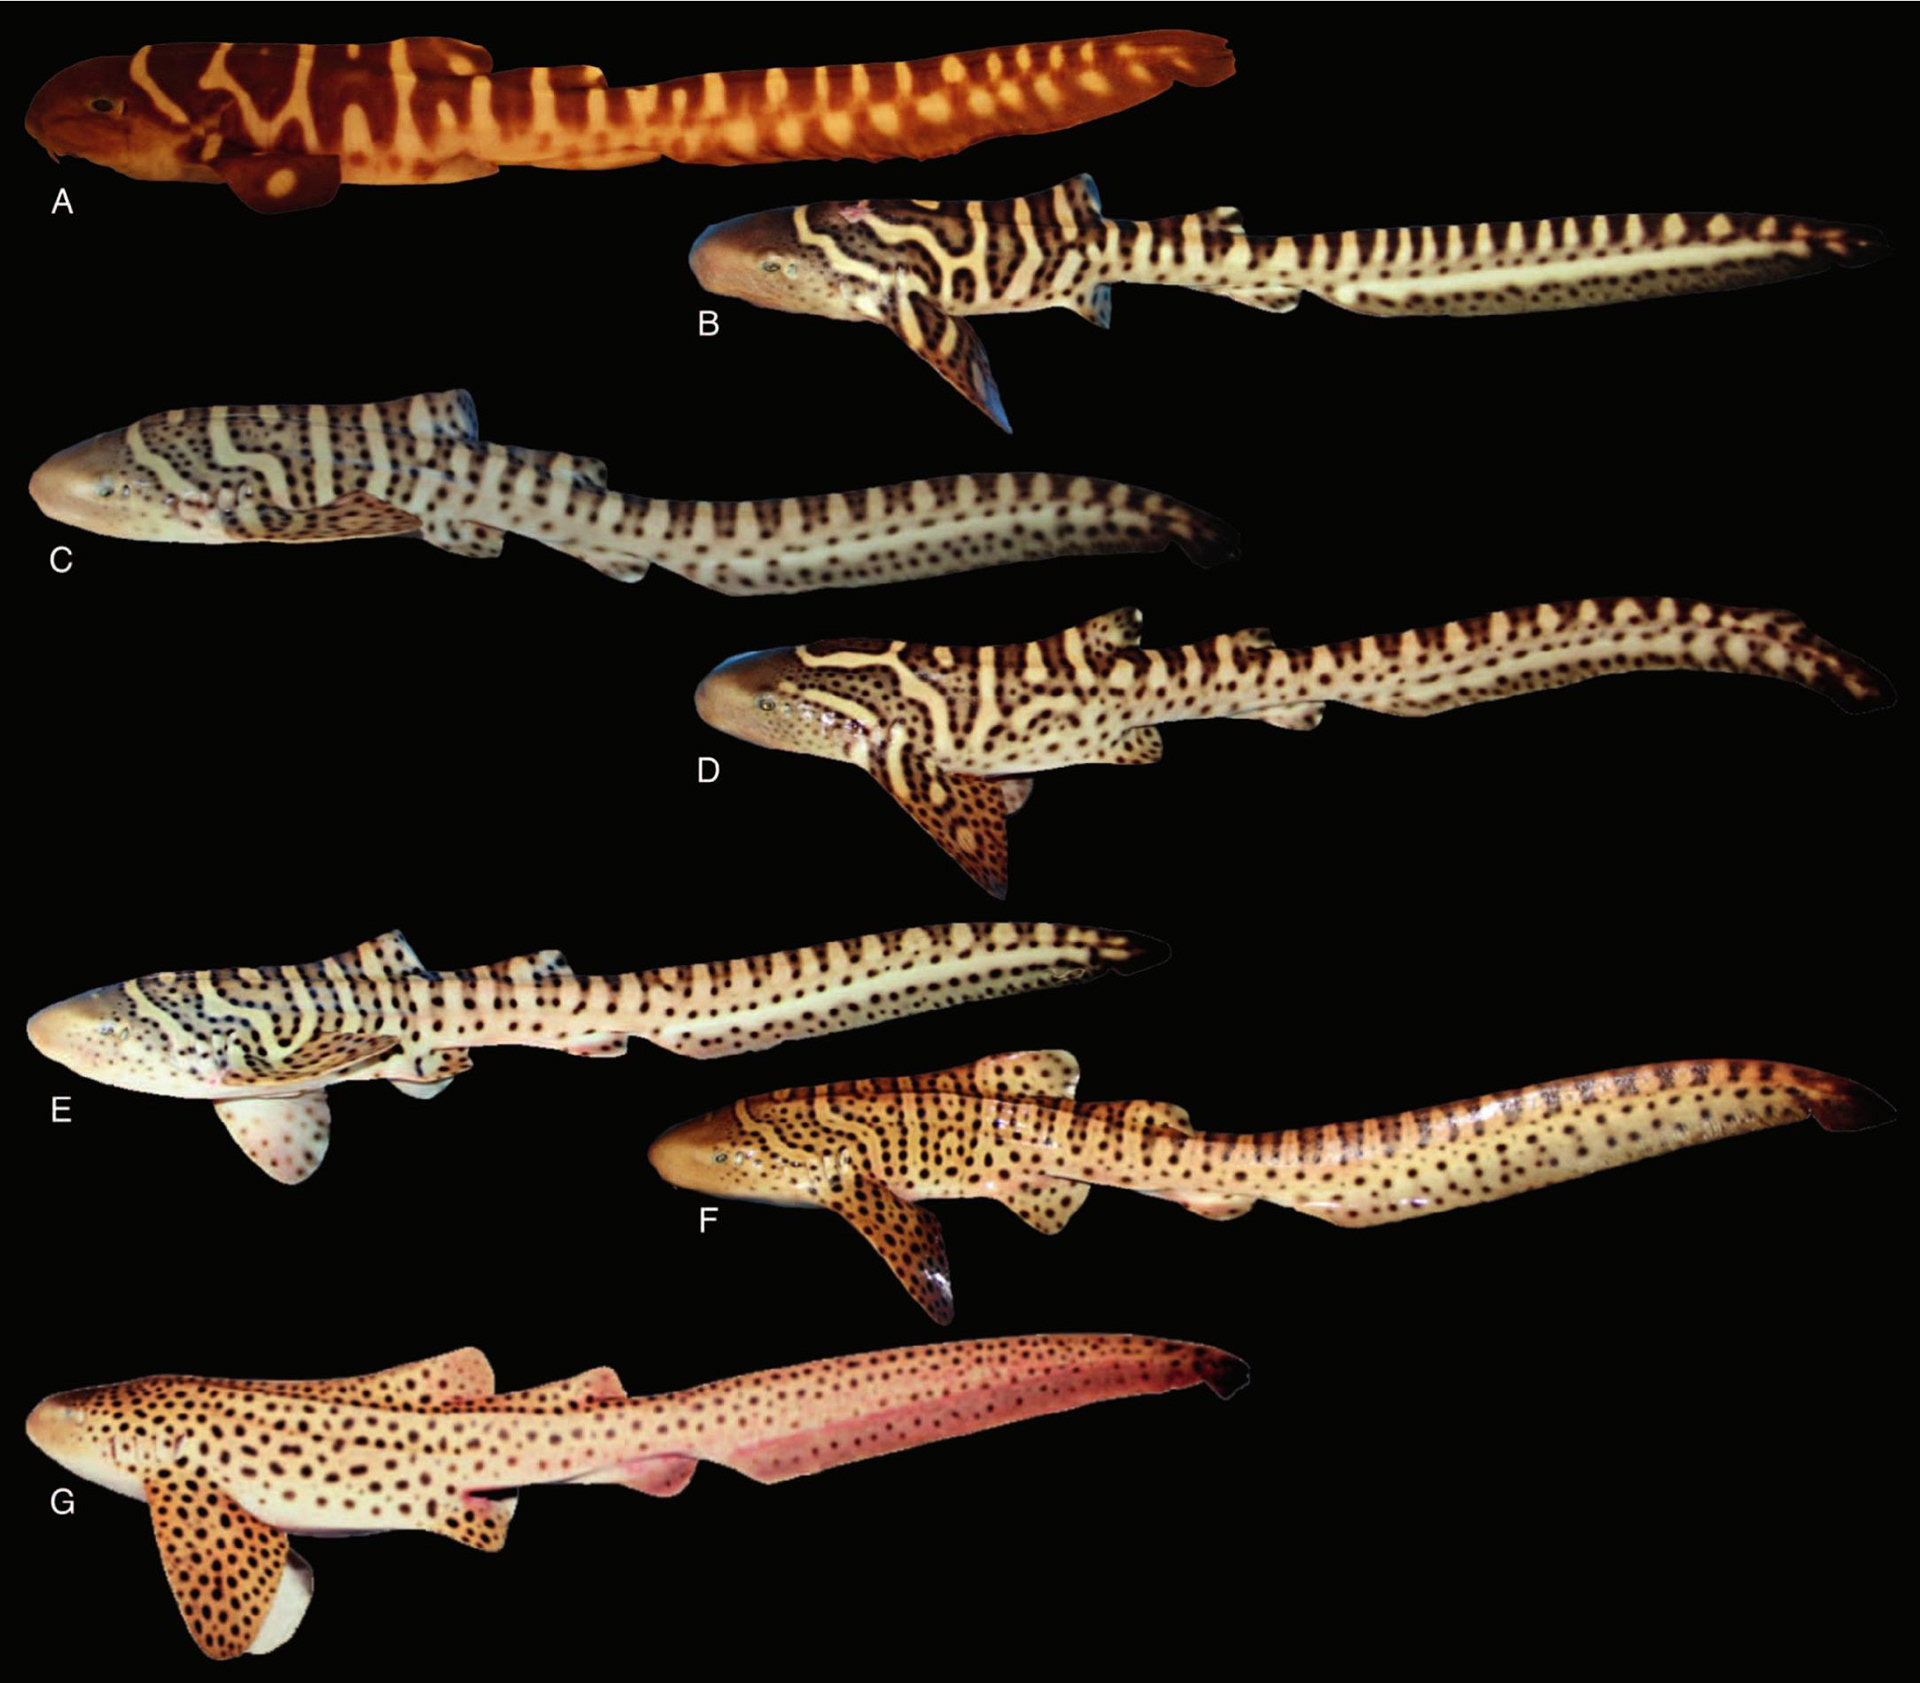
it took some time while researching to realize that zebra sharks had zebra-like stripes as juveniles but grew to develop a completely different pattern of spots similar to a cheetah's, which was, in fact, different from the look of leopard sharks. i was intrigued by the transition between the two, when the zebra sharks had white stripes surrounded by spots, and decided to explore this idea in the design. conveniently, mei herself looked like she could be the age of an adolescent.
coral catshark
leopard shark
zebra shark - juvenile
zebra shark - adolescent
zebra shark - adult
zebra shark - pattern transitions
process
i chose to color mei similar to images c and d on the last image above. on the orthographic drawing, i blocked out the white stripes, as i viewed their placement as the base of the pattern.
next, in substance painter, i blocked out the stripes on the model. i then worked on the blend between the base color and a darker, warmer brown, blocking out the gradient on the back and sides and starting on the ambient occlusion.
as i created more detail, i switched to using clip studio paint to paint onto the uv map. although substance painter would have worked, i like the brushes and layering system of clip studio better and have created a workflow using both. while i worked, i only looked at the unlit, flat colors on the model in order to create the ambient occlusion and color variation.
rig
style inspiration
similarly to my texture inspiration, i was inspired by the stylized rigs and animation of arcane and spider-man: into the spider-verse, even if i did not reach their levels of complexity and exaggeration.
realistic inspiration
my inspiration for the design of the mermaid were zebra sharks for the overall shape and whales for the muscles and fluke of the tail, as mei would swim vertically, similar to cetaceans.
process
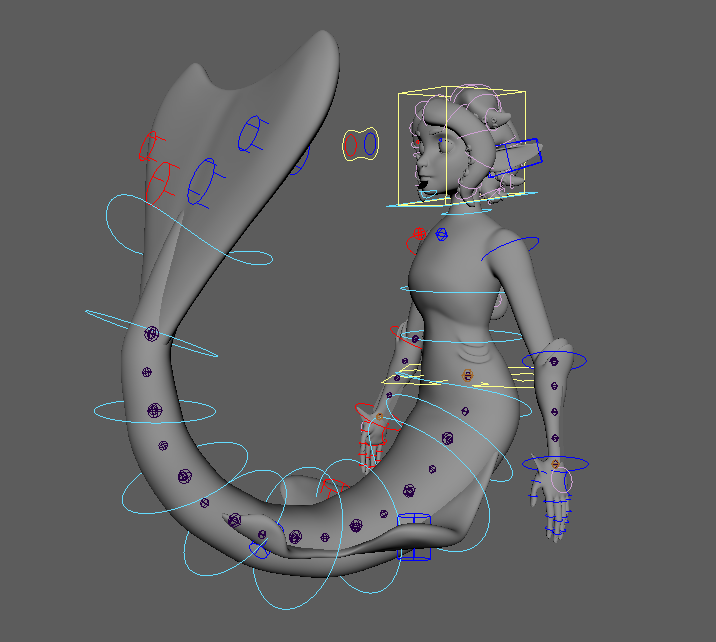
i first defined a purpose for the rig, which helped form the rig's "must-haves" and "nice-to-haves," as keith lango calls them. the rig's capabilities should not be created at random but for the purpose intended for the rig. the rig was created for the following purpose: short 30-second animations on YouTube or a demo reel; the ability to emote with the face and body and to interact with props.
the "must-haves" included the basic mobility of the limbs, spine, tail, and outer pieces of hair, and the basic ability to facially emote. some of the nice-to-haves included a switch between the neck and center-of-gravity root placement and an fk/ik switch for the spine. due to the time i alloted for this project, i was unable to finish either of these nice-to-haves but plan to implement them at a later time.
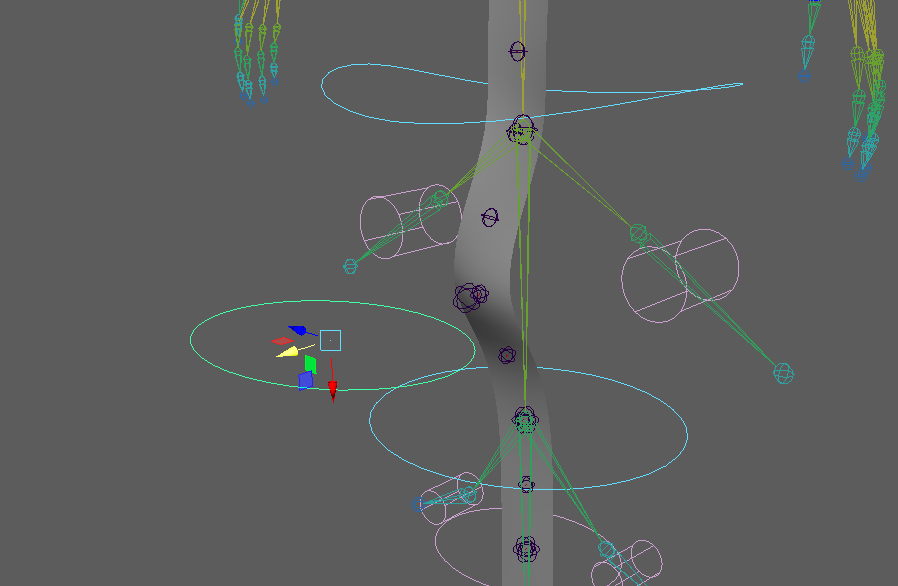
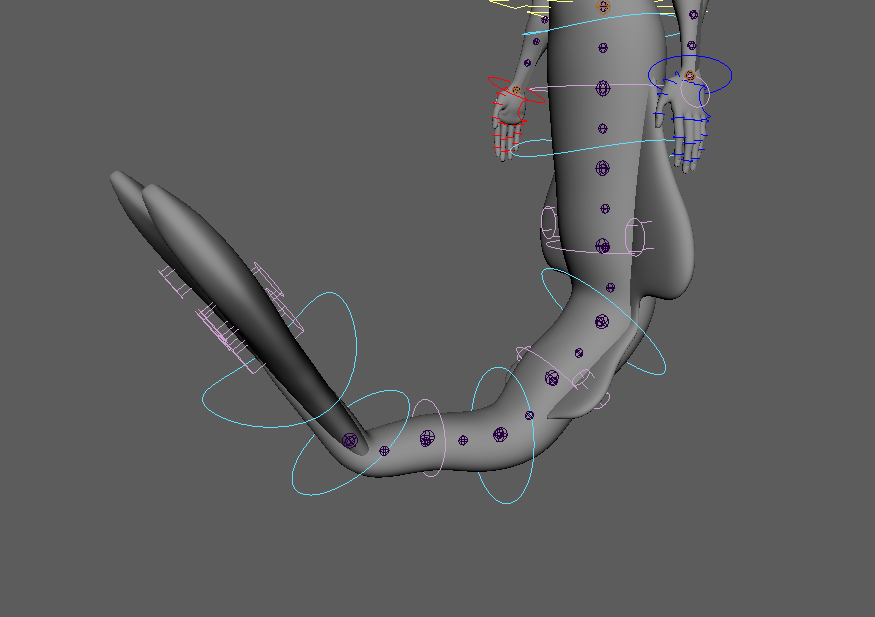
after making the skeleton, i created a ribbon for the forearm and for the tail. i originally planned on using every other spine joint as a deformer parented differently from the base chain (shown below). however, this made the tail bend look awful (pic 3), and it was not a necessary feature. although the ribbon did not end up being fully useful, i can better discern when to use ribbons in future rigs.
i had also planned to create a spine ribbon so that i could use a sine deformer on the ribbon to easily create a swimming animation. (a sine deformer test is shown below.) however, this would not create very realistic movement.
although less related to the rig, i created a script in a directed study that allowed me to easily copy and paste keyframes while shifting their time and amplitude in order to more quickly animate a swimming motion (shown below). i was able to shift the keyframes down the tail to create a ripple effect and amplified the values of later keyframes as the tail became smaller in size. i plan to improve the script by letting the user select more than two controls and input values for each on one screen.

forearm and tail ribbons
tail ribbon deformation control
ew
better
one of the smaller but more unique features i added was a control for the hand spread, inspired by the waitress rig found here. i connected the rotation of a control on the side of the hand to the rotation of finger joints near the wrist, which could be used subtly to spread the fingers or rotate them in a certain direction.
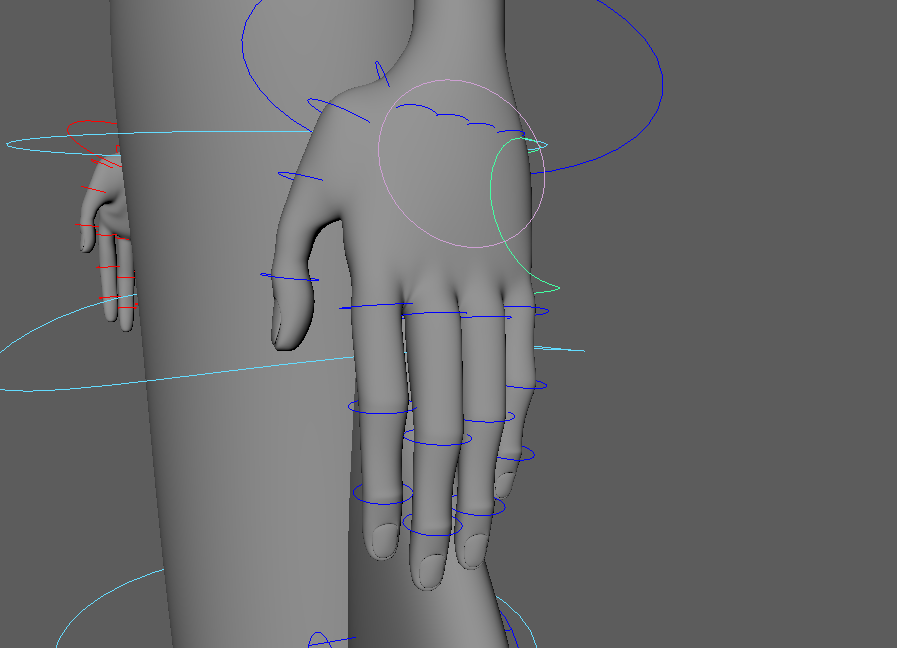
hand neutral
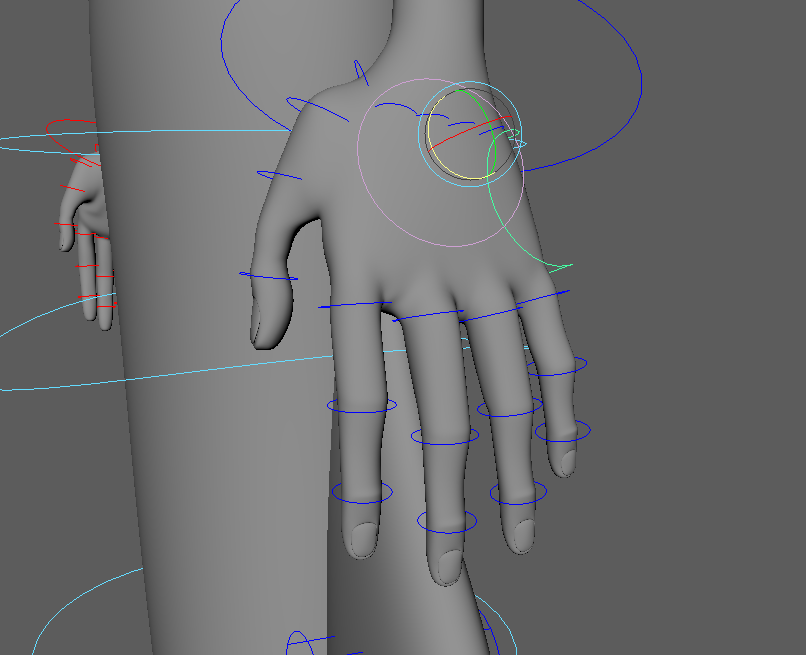
hand spread z

hand spread y
although facial animation was not the main focus on the rig, the ability to emote was one of the main goals. my mentor, keith lango, gave me a list of blend shapes for creating facial expressions that helped tremendously. i spent a lot of time in the mirror figuring out how facial muscles worked.
most of the blend shapes were driven by controls directly on the face for a more animator-friendly interface, and the rest were driven by controls on a panel next to the head. this was the first complex facial rig i have created, and i am proud of the result.
render
after animating, i lit and rendered the final product in unreal engine 4.
after lighting the scene and adding some atmospheric fog, i put a moving decal with a caustics texture on her and was able to render—and re-render as necessary—very quickly.
i learned so much while creating the rig and texture and hope to continue learning, both by creating future projects and by building on the work i have here.